Introduction: The Right Bit Makes All the Difference
You know the feeling.
You’ve got a beautiful ceramic tile, a piece of optical glass, or a marble slab. You need one clean hole. You grab your trusty twist drill bit… and crack. The whole piece splits right down the middle.
Frustrating, right?
Standard drill bits just aren’t made for hard, brittle materials. They grab, they heat up, and they destroy your workpiece.
Enter the sintered diamond core bit.
These little wonders grind through ceramics, glass, and stone like nothing else. No cracking. No chipping. Just clean, perfect holes every time.
In this guide, I’ll show you:
-
What makes sintered diamond core bits so special
-
Industrial Application Scenarios for Sintered Diamond Core Drill Bits
-
How to drill each material (ceramics, glass, optical glass, marble)
-
Speeds, cooling, and pressure tips that actually work
-
Common mistakes to avoid
Let’s get into it.
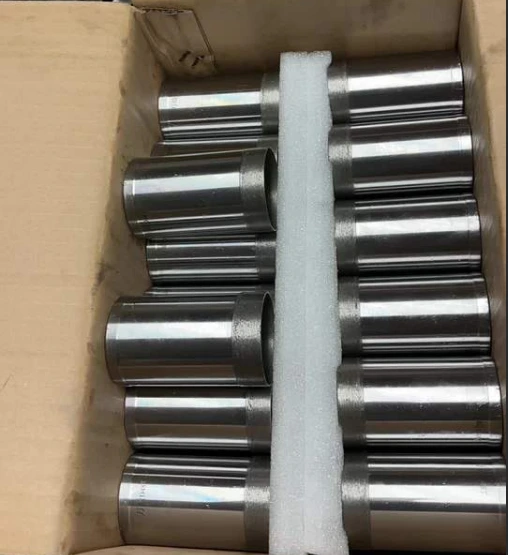
What Is a Sintered Diamond Core Bit?
First, a quick explanation.
A sintered diamond core bit looks like a small metal tube with diamond particles embedded in the rim. Unlike a regular drill bit that cuts, a diamond core bit grinds its way through material.
The “sintered” part means the diamond is fused into the metal matrix under high heat and pressure. That makes the bit incredibly durable – way tougher than cheap electroplated diamond bits where the diamond just sits on top.
Why Sintered Diamond Core Drills Are Perfect for Brittle Material Drilling
-
Integrated high-temperature sintered structure: Diamond grains are firmly fused into the metal matrix, no grain shedding, ensuring continuous and stable cutting
-
Uniform abrasive distribution: Balanced cutting force prevents local pressure concentration, avoiding material cracking
-
Hollow core drilling design: Fast chip removal, low friction, low heat generation, protecting brittle substrates
-
Long service life: Far more durable than electroplated diamond drills, suitable for continuous industrial batch processing
Why this matters to you:
-
The bit lasts for dozens (or hundreds) of holes
-
It stays sharp – no stopping to replace bits mid-project
-
It grinds smoothly, so brittle materials don’t crack
Once you try sintered diamond, you’ll love it!
Industrial Application Scenarios for Sintered Diamond Core Drill Bits
1. Optical Glass & High-Precision Glass Drilling
2. Industrial Ceramic & Technical Ceramic Drilling
3. Marble, Granite & Natural Stone Drilling
Drilling 101: Universal Rules for Diamond Core Bits
Before we get into specific materials, here are the golden rules that apply to everything:
Rule #1: Use Water (Seriously, Don’t Skip It)
Heat is the enemy. Diamond bits run cooler than steel, but they still need cooling. Water does three things:
-
Prevents heat cracks
-
Flushes out dust and slurry
-
Extends bit life dramatically
Pro tip: A simple spray bottle works for small jobs. For production work, use a small pump or a hose with a trickle.
Rule #2: Start Slow and Light
Begin at an angle to “scratch” a groove, then straighten up. Use light pressure until the bit is fully engaged. Once it’s tracking, apply steady – but not heavy – pressure.
Rule #3: Don’t Force It
If you’re pushing hard, something’s wrong. Let the diamond do the work. You should hear a smooth grinding sound, not squealing or chattering.
Rule #4: Support the Back Side
When you’re about to break through, the material can chip out on the exit side. Put a piece of scrap wood, plastic, or soft material underneath. Problem solved.
Now let’s get material‑specific.
Drilling Industrial Ceramics
Industrial ceramics (alumina, zirconia, silicon carbide) are tough. They’re designed to resist wear, which means they’re brutal on ordinary drill bits.
The Challenge
Ceramics are extremely hard and brittle. Too much pressure cracks the piece. Too much heat causes micro‑fractures.
The Solution
Sintered diamond core bits handle ceramic hardness with ease. The key is low speed and steady water cooling.
Recommended Settings
| Parameter | Setting |
|---|---|
| Speed | 500–1,500 RPM |
| Cooling | Water – continuous |
| Pressure | Light to moderate |
| Feed | Slow and consistent |
Pro Tips for Ceramics
-
Use a drill press if possible – hand drills work but require a steady hand
-
Tape a template to the surface to prevent bit walking
-
If you see white dust instead of wet slurry, add more water
What You Can Drill
-
Ceramic insulators
-
Electronic components
-
Wear parts
-
Ceramic tiles (for plumbing or electrical work)
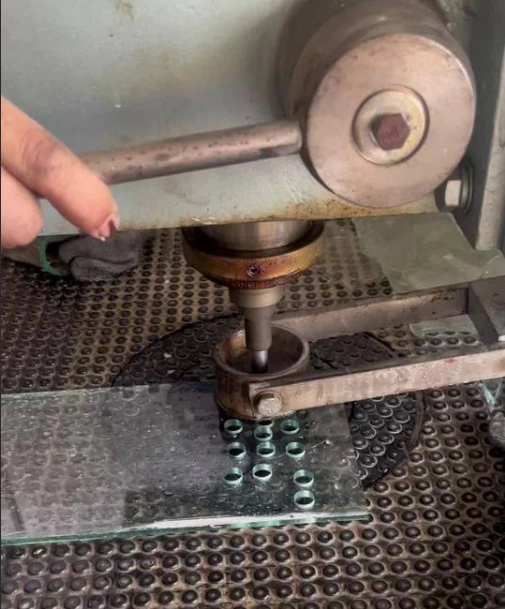
Drilling Glass & Optical Glass
Glass is the trickiest of the bunch. It’s hard, brittle, and absolutely hates heat. Optical glass (lenses, prisms, scientific components) is even more demanding – a single chip ruins the part.
The Challenge
Glass cracks from heat and vibration. Standard drill bits grab and shatter it. Even with diamond bits, technique matters a lot.
The Solution
Sintered diamond core bits with fine grit and plenty of water. Go slow. Go light. Be patient.
Recommended Settings
| Parameter | Setting |
|---|---|
| Speed | 500–1,000 RPM (slower for thick glass) |
| Cooling | Flood water – absolutely mandatory |
| Pressure | Very light – almost the weight of the drill alone |
| Feed | Slow, steady, no forcing |
Pro Tips for Glass
-
Start at a 45° angle – Tilt the bit to establish a small groove, then slowly straighten up. This prevents skating.
-
Use a dam or putty ring – Build a small wall of plumber’s putty around the hole and fill it with water. Instant cooling bath.
-
Drill from both sides – For thick glass, go halfway, flip it over, and finish from the other side. Cleanest holes possible.
-
Support underneath – Soft wood or foam prevents blowout.
What You Can Drill
-
Glass bottles (for crafts or lamps)
-
Architectural glass panels
-
Laboratory glassware
-
Optical lenses and mirrors (with fine grit bits)
Drilling Marble & Natural Stone
Marble is softer than ceramics but still needs diamond tooling for clean holes. The biggest risk is blowout – chipping on the exit side.
The Challenge
Marble’s crystalline structure can fracture if you drill too aggressively. The dust is also abrasive and will destroy non-diamond bits quickly.
The Solution
Sintered diamond core bits with medium grit. Water cooling keeps dust down and the bit running cool.
Recommended Settings
| Parameter | Setting |
|---|---|
| Speed | 1,000–2,000 RPM |
| Cooling | Water recommended (reduces dust) |
| Pressure | Moderate, steady |
| Feed | Consistent – don’t stop in the middle |
Pro Tips for Marble
-
Back it up – Place a scrap piece of marble or wood underneath. This stops exit-side blowout completely.
-
Use a drill guide – Keeps the bit perpendicular. Angled holes are much harder to get right.
-
Don’t force the last millimeter – Let the bit gently break through on its own.
What You Can Drill
-
Marble countertops (for faucets or soap dispensers)
-
Stone tiles
-
Memorial stone
-
Decorative stonework
Quick Reference Table
| Material | Speed (RPM) | Cooling | Pressure | Difficulty |
|---|---|---|---|---|
| Industrial Ceramics | 500–1,500 | Water – continuous | Light–moderate | Hard |
| Glass / Optical Glass | 500–1,000 | Flood water – required | Very light | Tricky |
| Marble | 1,000–2,000 | Water recommended | Moderate | Medium |
Common Mistakes (And How to Avoid Them)
Mistake #1: No Water
What happens: The bit overheats. Glass cracks. Ceramics discolor. Diamond wears out fast.
Fix: Always use water. Even a spray bottle is better than nothing.
Mistake #2: Too Much Pressure
What happens: You force the bit, it grabs, and the material shatters.
Fix: Let the diamond grind. Light pressure. Patience.
Mistake #3: Starting Straight Down
What happens: The bit skates across the smooth surface. You ruin the finish.
Fix: Start at a 45° angle to carve a notch, then straighten up.
Mistake #4: No Backing Material
What happens: The bit blows out a chunk on the exit side.
Fix: Put wood or scrap underneath. Ten seconds of prep saves a ruined workpiece.
Sintered Diamond vs. Other Bit Types
| Bit Type | Best For | Lifespan on Hard Materials | Chip Risk |
|---|---|---|---|
| Twist drill (HSS) | Wood, plastic | Very short | Very high |
| Carbide bit | Mild steel, tile | Short | High |
| Electroplated diamond | Occasional use | Medium | Medium |
| Sintered diamond | Production, hard materials | Very long | Low |
Bottom line: If you drill ceramics, glass, or stone more than once a month, sintered diamond pays for itself quickly.
Final Thoughts
Drilling holes in hard, brittle materials doesn’t have to be a gamble.
With a sintered diamond core bit and the right technique, you can drill clean, chip‑free holes in industrial ceramics, glass, optical glass, and marble – every single time.
Remember the basics:
-
Use water for cooling
-
Start slow and light
-
Back up the exit side
-
Let the diamond do the work
Whether you’re a DIYer drilling a glass bottle for a lamp, a tile setter installing bathroom fixtures, or a fabricator working with technical ceramics – sintered diamond core bits are the tool you need in your kit.
Got Questions? Let’s Talk.
Tried drilling glass and ended up with a cracked mess? Not sure which grit or diameter you need? I’ve been there.
Drop a comment below or reach out – I’m happy to help you pick the right bit for your project.
And if you’re ready to try sintered diamond for yourself, check out our full lineup of core bits. One hole is all it takes to become a believer.